• DeletedRemoved user
    a year ago

    I've been trying to understand Fourier transforms - not easy for an 83-yr old geezer!

    But today I deleted low frequencies from an FFT plot and was quite surprised at the result ...

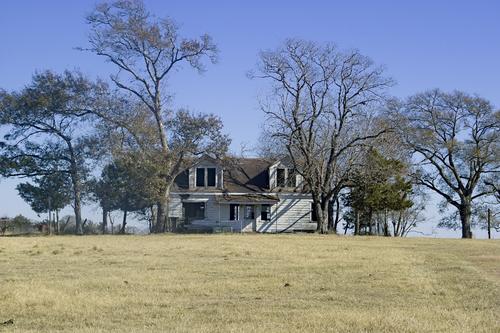
    The Victim:

    SDIM8301-SPP-RT-2.jpg

    The result:

    Inverse FFT of SDIM8301-SPP-RT-2.jpg

    Kind of like wavelet processing but where frequency is the inverse of detail size ...

    Inverse FFT of SDIM8301-SPP-RT-2.jpg

    JPG, 1.2 MB, uploaded by xpatUSA a year ago.

    SDIM8301-SPP-RT-2.jpg

    JPG, 4.3 MB, uploaded by xpatUSA a year ago.

  • 181 posts
    a year ago
  • DeletedRemoved user
    a year ago

    My computer is Adobe-free - but an interesting read nevertheless. Quite a lot of steps needed, it seems.

    In the FFT plot, I deleted a small circle in the middle and then inverse FFT'd back to a 2D image.

  • 181 posts
    a year ago

    Your photo is interesting and successful in itself, but without lighting effects it is far from something that looks real as a night photo.

  • doctorpanorama_fish_eye
    663 posts
    a year ago

    ¡Hola!
    It depends a little on each specific photo, but achieving a more or less credible effect is usually a laborious process.This is my try...

    IMG_7217.jpeg

    IMG_7217.jpeg

    JPG, 2.2 MB, uploaded by doctor a year ago.

  • ArvoJlens
    a year ago

    They are related, Fourier transform is equivalent to very special case of wavelet processing. Wavelet transforms decompose image into frequency+time components, Fourier transform only into frequency components. Both transforms are reversible.

    About getting your night scene using fourier transform.

    If you remove low frequencies, then you start from zero frequency, which corresponds to average value of your signal (image) - average of sky and field; removing it makes average value zero (shifts all values). Then removing next low fequency component (we are talking about discrete FT here - in continous case there is continous spectrum of frequencies) approximately removes differences between halves of your image (in every direction) - making sky and field same brightness (if you process colors seprately, then same color too). Then removing next low frequency component (again approximately) removes difference between image center and border areas and so on.

    You could get similar effect using high-pass filter with very steep transmission curve.

  • DeletedRemoved user
    a year ago

    Agreed. The posted image was an accident while playing with FFT, so wasn't actually trying to create a realistic night scene.

  • DeletedRemoved user
    a year ago

    Not bad! I like the lighted windows ...

  • DeletedRemoved user
    a year ago

    Thanks, Arvo. Good to see that you are in the team!

  • Maobylens
    1595 posts
    a year ago

    Me too 😎 👍🏻

  • AlanShpanorama_fish_eye
    a year ago

    I liked the tutorial. Gives me some ideas (if I ever get time).

  • JACShelp_outline
    878 posts
    a year ago

    [deleted]

  • DeletedRemoved user
    a year ago

    What?

    What?! There are no negative values to truncate!

    ah.jpg

    Please define "a proper rendering" ...

    ah.jpg

    JPG, 377.3 KB, uploaded by xpatUSA a year ago.

  • Ghundredpanorama_fish_eye
    758 posts
    a year ago

    What about ND filters?

  • JACShelp_outline
    878 posts
    a year ago

    [deleted]

  • DeletedRemoved user
    a year ago

    I fold

  • edit

    Thread title has been changed from How to turn Day into Night.