• Removed user
    Sept. 23, 2023, 6:28 p.m.

    If the goal of this thread has moved from in-camera to post-processing, there are a kajillion options to get a "painterly" appearance in software like the GIMP especially with plugins like G'MIC ...

    Point being that, with modern monitors, the "points" are smaller than most people can distinguish depending on viewing distance ...

  • Members 535 posts
    Sept. 23, 2023, 6:37 p.m.

    A similar effect can be obtained by dusting the lens, or as I prefer a cheap clear filter, with spray paint. Hairspray is another alternative. Either is less messy (in use) than petroleum jelly.

    Public Art Interaction.jpg

    The Krylonmist filter used to make the image above was produced using a heavy dusting of gold and bronze paint. (It’s what I had sitting on the shelf)

    Krylonmist.jpg

    Krylonmist.jpg

    JPG, 337.8 KB, uploaded by jaberg on Sept. 23, 2023.

  • Members 1662 posts
    Sept. 23, 2023, 6:44 p.m.

    I actually hope that the goal hasn‘t moved, but as I‘ve stated post processing techniques are also very welcome in addition!

  • Members 1662 posts
    Sept. 23, 2023, 6:51 p.m.

    Excellent - thanks a lot for sharing that! Looks very interesting and quite effective. Two questions:

    1.) have you ever tried making vertical lines instead of dots?
    2.) do you have another sample shot with a slightly darker background?

  • Members 535 posts
    Sept. 23, 2023, 7:06 p.m.

    Any camera of sufficiently low resolution will produce this. It can be boosted by using a camera that lets you dial down the bit depth.
    BitCam Still Life .jpg

    BitCam - FatBits Pointillism .jpg

    I made this SOOC still life using the Bitcam app for iPhone. The second image uses the app’s FatBits option. Note that it’s more proof-of concept than artistic endeavor. Total time from concept to upload was less than 60 seconds. I include the Leica Digilux in this composition because its 1.2 MP sensor is easily pushed to the point of pointillism. (Not so much. I went digging for samples. I was thinking of an earlier camera.) The Minox B is, of course, for film pointillists.

    BitCam Still Life .jpg

    JPG, 2.2 MB, uploaded by jaberg on Sept. 23, 2023.

    BitCam - FatBits Pointillism .jpg

    JPG, 762.0 KB, uploaded by jaberg on Sept. 23, 2023.

  • Members 535 posts
    Sept. 23, 2023, 7:13 p.m.
    1. No. But I might take a thin lined Sharpie to an Ali Express clear filter someday. (I need to order some experimental stock.)

    2. Metropolitan.jpg
      Volvo.jpg

    Volvo.jpg

    JPG, 328.3 KB, uploaded by jaberg on Sept. 23, 2023.

    Metropolitan.jpg

    JPG, 267.7 KB, uploaded by jaberg on Sept. 23, 2023.

  • Members 535 posts
    Sept. 23, 2023, 7:28 p.m.

    And to bring my contribution to this thread full circle, I offer for comparison a scan from a print of an image made of a Nash Metropolitan using a Minox B.

    Izzy.jpeg

    Izzy.jpeg

    JPG, 37.9 KB, uploaded by jaberg on Sept. 23, 2023.

  • Removed user
    Sept. 23, 2023, 7:45 p.m.

    How to "pointillize" an image ...

    1) Pick a victim:

    lakeside1.jpg

    2) Steal a Seurat:

    seurat.jpg

    3) Apply G'MIC's 'Stylize' artistic filter:

    lakeside1seurat.jpg

    Way over the top for illustration purposes - G'MIC has a kajillion of sliders to tone stuff down.

    lakeside1seurat.jpg

    JPG, 2.4 MB, uploaded by xpatUSA on Sept. 23, 2023.

    seurat.jpg

    JPG, 566.7 KB, uploaded by xpatUSA on Sept. 23, 2023.

    lakeside1.jpg

    JPG, 191.4 KB, uploaded by xpatUSA on Sept. 23, 2023.

  • Members 1662 posts
    Sept. 23, 2023, 7:59 p.m.

    Okay - here's another solution:

    Multiple exposure

    1.) Texture shot: shoot your desired background pattern (in my case I used a rough sackcloth to illustrate things). It may be beneficial to do that first as part of a multiple exposure of two images. (I only started experimenting with this 30 minutes ago, so take everything with a grain of salt) I feel like it might work best if it's not heavily lit compared to what you want to ultimately shoot as your main shot.

    2.) Main shot: compose and shoot your main image. I don't know how other cameras handle this, but in my case (I used this function the first time today 😅) I get an overlay showing the image I just shot, so I can compose my main image with an estimation of how it's going to look like.

    Highkor_40mm_002_B.jpg

    I had my camera still on high ISO. Of course you don't need that with this technique, so you may continue following your usual instinct to shoot at lower ISO - it will most likely net you better results than combining it, but it could be worth a try in certain situations.

    The look and feel depends a lot on a.) the angle you shoot your background material with (I did that pretty straight from above), b.) the lens (the Highkor I used here shows lots of distortion) and c.) how you focus on your texture shot. Everything is out of focus in mine, but depending on the size of the material you can vary that a lot.

    Highkor_40mm_002_B.jpg

    JPG, 941.0 KB, uploaded by simplejoy on Sept. 23, 2023.

  • Members 861 posts
    Sept. 23, 2023, 9:30 p.m.

    I got something in mind much better than low resolution illusions....now the question is can I make it happen? Test one is already a fail, and I fear I may have to shoot in medium format or larger to achieve what I'm thinking simply due to physics. Off to the craft store in a few hours for the next try.

    I appreciate the idea, but it doesn't lend itself to making personal discoveries, if possible.

    Been through it already. Got a couple of gigs of texture files built up. Sometimes I can make things work with this method.

    The high ISO idea is based on an accidental discovery I made once using some tool in photoshop. It was because of the color distortion in the noise, when I started "painting" in the method I'm currently blanking on, it added that randomness with the stroke that brought a life to the image. It was like a paintbrush with color left mixed in because it wasn't cleaned properly.

  • Members 1662 posts
    Sept. 23, 2023, 9:37 p.m.

    What you seem to be talking about is applying separate texture shots in post processing... That's not what I was suggesting though. I was talking about a multiple in-camera exposure, one of which focused on a texture, the other one is the shot you want to take. This way you get a result immediately, which you can of course further process in post.

  • Removed user
    Sept. 23, 2023, 9:44 p.m.

    Oh

  • Members 1662 posts
    Sept. 24, 2023, 9:22 a.m.

    Okay, here's another sample outside:

    Highkor_40mm_514.jpg

    Not sure if anyone cares about that, but I think with a few additional things considered in terms of lighting and a different material (an actual canvas for example), this could actually be improved significantly.

    Highkor_40mm_514.jpg

    JPG, 1.6 MB, uploaded by simplejoy on Sept. 24, 2023.

  • Members 568 posts
    Sept. 24, 2023, 6:57 p.m.

    I've been playing with multi exposures and ICM for a few years and much enjoy the effects, though there are a lot of duds! So here's my view for what it's worth.

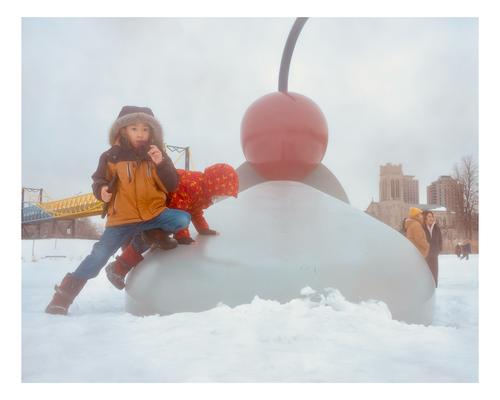
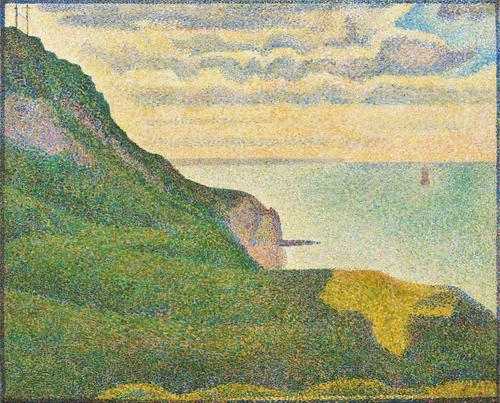
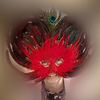
    It seems to me that the image above is actually a blend of three originals. That's fine, in camera triple exposures are just as easy as two. There's the landscape background, its texture and then the chairs etc. All of that could be acheived in camera, BUT, the background images would show through the chairs. There's no way to select only the foreground and erase the background from it in camera. So that surrealist effect is a bit problematic. But if it's Pointilism or Impressionism, or indeed some other style you're after, then...
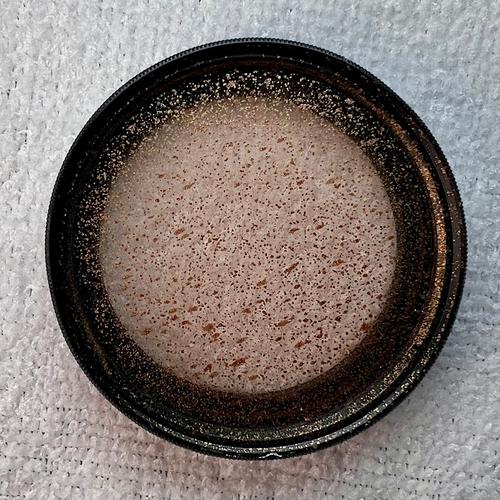
    My own photography is always based on the principle of capturing the essence place, so I don't walk around with a memory card full of clouds 😁 but I do often utilise a texture and superimpose onto another scene from the same or close locality;

    P4165810.jpg

    P9159652.jpg

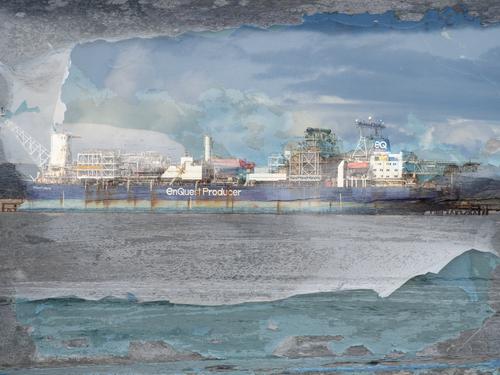
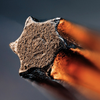
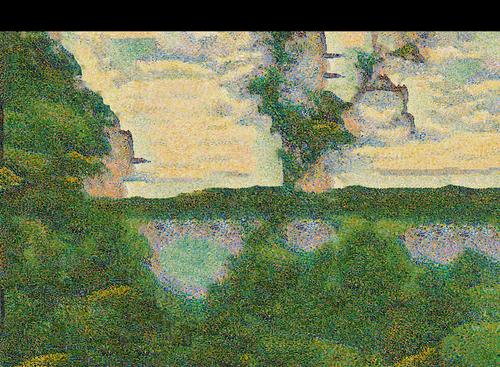
    The superimposed image could itself use ICM (Intentional Camera Movement):

    P7319607.12.jpg

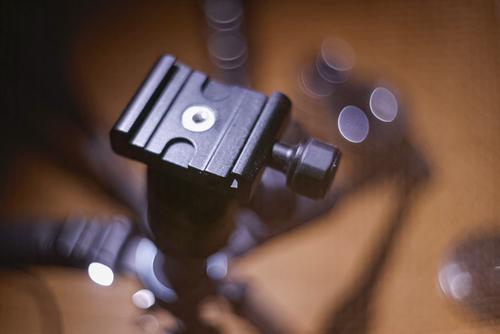
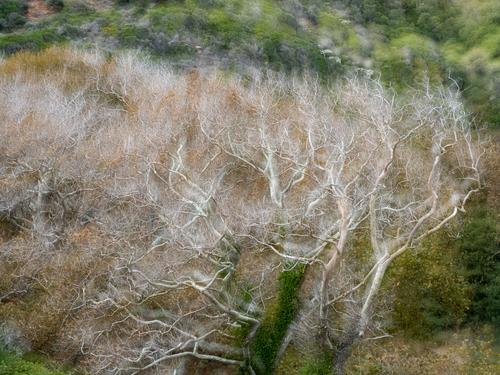
    Another type of effect is sometimes known as the Orton effect, and superimposes a slightly overexposed, out of focus image onto the normal exposure of the same subject. I find it easier to take the OOF shot first, then the sharp version. I assume that in most cameras it's possible to see the overlay as you compose the second shot.

    PA135414.jpg

    PC168966.jpg

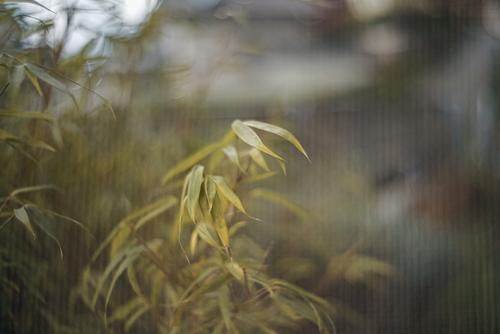
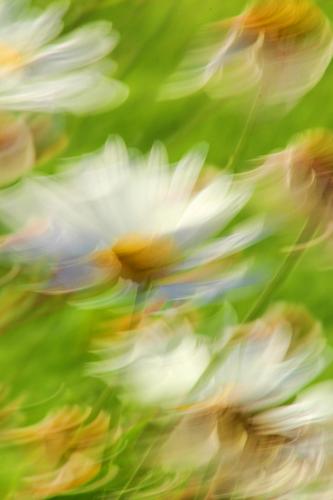
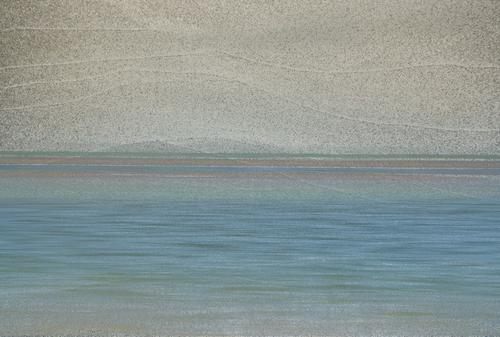
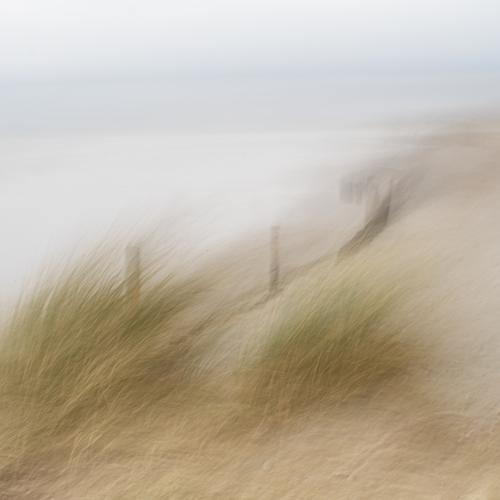
    Sometimes just ICM can give a great effect. Be prepared for a LOT of trial and error!;

    P2194762.jpg

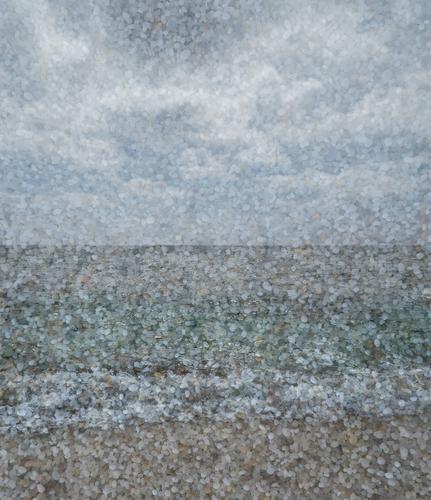
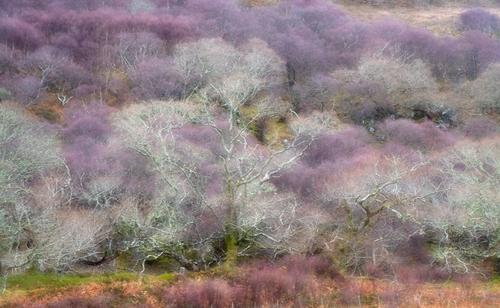
    This one combines a straight shot with an ICM shot;

    PA116755.jpg

    I use an Olympus EM5 II, which allows blending of as many images as you like, but you have to allow for each image adding to the total exposure. So if you're blending 2 shots, you need to cut exposure of each by half. For four superimposed images, give each a quarter of the normal exposure. On the Oly, there's no way to control the exposure blend, but I have found that the 'prominence' of each shot is dependent on exposure - if you want it more pronounced, under expose more. Also, where one shot has a darker patch, the other shot will be more prominent. Some high end full frame cameras (mainly Canon I think) have different blending modes, allowing all sorts of possibilities, but these are sadly beyond my reach - or carrying capacity for the kinds of places I visit 😁 I do of course enhance the images in post, but the basic blending is all in-camera. I often play with Clarity (often reducing it) and Texture (increase) as well as contrast and overall exposure. Nothing fancy, all in Lr.
    If you really want to see what the professionals can achieve, take a look at the work of Valda Bailey www.valdabailey.com/portfolio or Doug Chinnery www.dougchinnery.com/

    PA116755.jpg

    JPG, 2.8 MB, uploaded by Woodsider79 on Sept. 24, 2023.

    P2194762.jpg

    JPG, 2.4 MB, uploaded by Woodsider79 on Sept. 24, 2023.

    PA135414.jpg

    JPG, 5.4 MB, uploaded by Woodsider79 on Sept. 24, 2023.

    PC168966.jpg

    JPG, 3.0 MB, uploaded by Woodsider79 on Sept. 24, 2023.

    P9159652.jpg

    JPG, 3.2 MB, uploaded by Woodsider79 on Sept. 24, 2023.

    P7319607.12.jpg

    JPG, 4.2 MB, uploaded by Woodsider79 on Sept. 24, 2023.

    P4165810.jpg

    JPG, 4.1 MB, uploaded by Woodsider79 on Sept. 24, 2023.

  • Members 861 posts
    Sept. 24, 2023, 7:16 p.m.

    Unfortunately my current gear choices don't have the multi exposure option.

    Your suggestion does intrigue me enough to consider breaking out the 5dm3 again.

  • Members 1662 posts
    Sept. 24, 2023, 8:34 p.m.

    Thank you so much for sharing your experience and wisdom with us - that's wonderful! 👍 I've just started experimenting with it, but I already feel like it's a lot of fun and a great way to think outside the box from time to time.

  • Members 523 posts
    Sept. 24, 2023, 9:42 p.m.

    Just discovered this thread, didn't know simple.joy was posting my image as example of what someone might want to achieve in-camera with no processing 😀

    Here is a 2015 photo, 99% in-camera. Zoom lens, slow shutter speed with both movement and pulling in the lens for different focal lengths. Single image, total luck!!

    img_2842_fm_jpg.jpg

    img_2842_fm_jpg.jpg

    JPG, 412.9 KB, uploaded by LindaS on Sept. 24, 2023.

  • Members 1662 posts
    Sept. 24, 2023, 10:25 p.m.

    Sorry - there really should be an option to be notified when we're quoted somewhere... but perhaps I'm missing something! Thanks for providing that interesting sample.

    I really like your painterly flower shot btw. - looks wonderful! 👍