I'm slowly learning darktable.
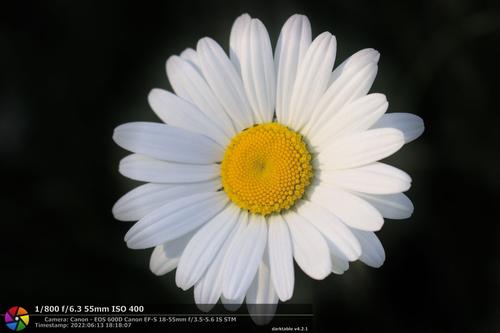
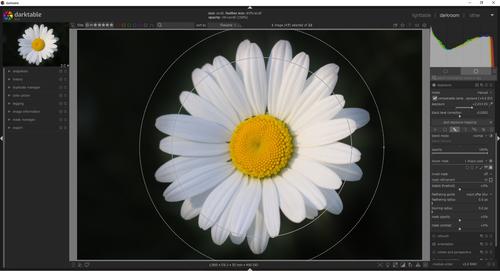
This is my first attempt using a mask - this is just a simple "circle" exposure mask.
I'm pretty primitive with darktable... I think I'm slowly improving, though.

I'm slowly learning darktable.
This is my first attempt using a mask - this is just a simple "circle" exposure mask.
I'm pretty primitive with darktable... I think I'm slowly improving, though.
Just seen this. Also a darktable user. Any questions I can help with, I'll do my best.
darktable masking is very powerful.
I usually use the combined parametric and drawn masks button, even if I just using drawn masks. I find the path tool very useful, it lets you draw complicated shapes, then use the feather slider to blend the mask in. The display mask button is helpful for reminding you where your masks are. The alt key is useful when you click on a mask tool. It allows you to create multiple masks without having to repeatedly reclick a mask tool icon every time.
You can also combine masks in complicated ways using the mask manager on the left panel of the darkroom tab. It lets you do things like intersect two masks so the module only applies to the intersected area rather the whole masked area.
I also like using the drop down list labeled "No mask used". This keeps a list of the masks you have created so far and lets you re-use a mask drawn in one module in another. For example, your mask above might be used in the exposure module to darken the whites of the flower. Then you might want to use the sharpen module but restrict sharpening to the flower. In the sharpen module if you click on "no mask used" drop down, you'll find the first mask you created listed there. You can select it and re-use it to restrict sharpening. Quite handy when you want to apply several modules to the same place and saves on redrawing the same mask in every module.
Wow, thanks very much for the useful info.
To be honest I was just experimenting (with the masking). I haven't had another chance to try the masking, but I'll definitely be back with questions in a day or two.
Thanks again.
The masking is a great feature. Well worth learning the basics, it will transform how you edit.
Example: let's say you have almost finished a file, applied all the complicated processing you want, and have things exactly how you want. Then you click the over/under exposure warnings and discover a couple of areas in the image that your processing has caused to clip. And you don't want to undo all your previous editing.
Easy! Go to the exposure module, click the little icon to create a second instance of the module, open up the panel, click the drawn mask button, use the circle tool to draw masks around the burnt areas, pull back on the exposure slider until those areas are no longer clipped, apply a bit of feather to blend in the recovered areas and you are done, clipped areas fixed and all your earlier processing left intact.
Thanks for the tip.
Hi Dunlin. I'm another guy new to Darktable. I've been using it for about 8 months now and have sort of worked out some of the basics. Watching a few tutorials on masking, it appears to be a very powerful tool, but my basic attempts at parametric masking have so far failed.
@DavidMiller is there a good tutorial that walks through a simple parametric mask and how to apply it to other modules?
Hi @fredk,
I know you didn't address your question to me, but Bruce Williams has some videos on masking. I have not actually watched any on masking (yet) but his other videos on darktable are pretty good.
Here's Bruce's YouTube channel: www.youtube.com/@audio2u
Maybe this video? www.youtube.com/watch?v=xjAlbz5fqNY (I'm planning to watch it in the next few days).
Thanks. I think I've actually watched that one. Part of my problem is actually finding the time to figure things out.

Also have a look at Boris Hadjukovic videos...search "editing moments in darktable" on YouTube.
The Bruce and Boris channels are the best I've found.
In terms of using parametric masks, you need to start by asking yourself why you want to use them and is that the best method.
I mainly use drawn masks - with parametric masks sometimes used to refine the drawn mask. I've rarely found parametric masks on their own that useful. My experience is that for general purpose use, parametric masks tend to produce "spotty" results with masked and unmasked splodges intermixed.
You can solve this by messing about with expanding and contracting the end points until you included everything you want, but unless you are masking a red phone box or a bright yellow boat or something like that, I find drawn masks more convenient as a starting place. I do use parametric to refine a drawn mask I can't draw it satisfactorily eg I draw around something but can't accurately exclude bits of bright sky around the edges of the mask. So combine it with a parametric tuned to exclude the bright bits. Something like that.
Drawn masks are also more intuitive. The path tool allows you to draw any shape if you are patient. Click, click, click, click click to add as many points as you want or draw crudely and use the feather slider to blend in the mask. Much of the time crude is absolutely fine.
It would be good if darktable got AI mask selection tools as well to make masks selection quicker. Maybe one day.
I think the key thing about masking is that the tools are very powerful. And tutorials also tend to be complex in acknowledgement of this fact. Following complex tutorials can lead you to try and solve problems with overly complex use of the tools. Trying to start by using the tools to solve the most complex masking problems can get you befuddled. Leave those skills for edge cases when you're more experienced. It's often better to concentrate on working with a very simplified approach. In a lot of cases that will get you where you need to be.
I'd practise by doing something like using a drawn mask to lighten or darken a broad area of the image. Then use the feather tool to blend it in invisibly. Or use it to selectively sharpen different areas, again using a rough drawn mask. Practise the simple basics like this and you will get a lot of benefit. Doing local edits with masks crudely is often better than global editing.
Ansel Adams had cardboard taped to sticks to work with. You don't need advanced parametric mask drawing skills to get good results!
You could share an example image and explain what you want to do to it. I could have a go with my usual methods and if it works share the process...
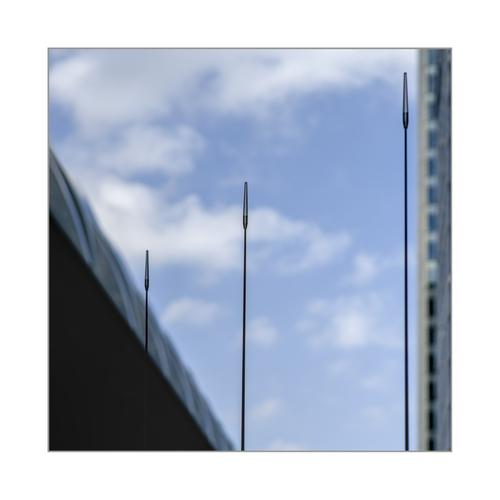
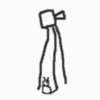
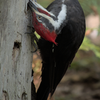
Here's a simple example of my own:
This image has very shallow depth of field. Only the light stick things are in focus. There is no value in sharpening the majority of the frame because is it not in focus. So no global sharpening used. Instead I used drawn masks, the oval tool and feathering to smooth the mask. I placed 3 oval masks over the sharp bits and applied sharpening through the masks.
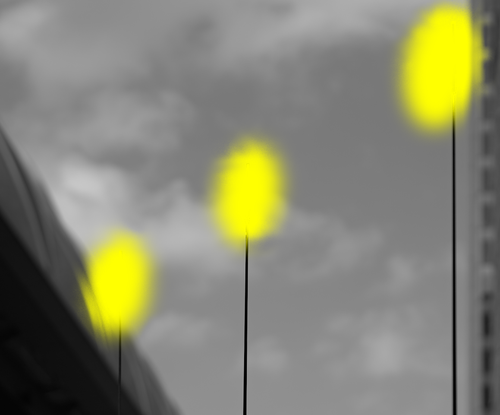
To create 3 separate masks, control click the oval masking tool rather just clicking it. That allows you to create more than one mask. The feather applies to all three. In most cases the mask doesn't have to be accurate because the feathering smooths the edges. Tip: If you mess up, click the little arrow icon to make the outlines of the masks show, then position the cursor over the outline of the broken mask and right click to delete it while leaving the other masks intact.
Screenshot of my masks. Dead simple.
I find even simple, basic use of masking like this example powerful in conjunction with the ability to create multiple instances of modules.
For example, an alternative to global editing is to do lots of local edits. The curves tool is quite powerful for altering tonality when used globally. It becomes even more powerful for more subtle editing if you use multiple instances of the curves tool to do local edits. Each instance can have its own mask to restrict its operation to part of the image.
This is very similar to how you might use curves, masks and layers in photoshop. In fact, I got the idea of editing like this from Bruce Percy's ebook brucepercy.co.uk/store/advanced-photoshop-curves. He uses photoshop layers to do it, I adapted the approach to darktable substituting multiple curves module instances and local masks for layers. Do it this way and you keep the whole editing process non-destructive in the original raw within darktable rather than having to go out to a raster editor and work with a huge layered file.