I'm curious what the general user here prefers? By "general retouching" does it mean minimal? I really enjoyed , at the old DPreview, when examples were posted for everyone to practice/"process". I can see that if that is your occupation, having free examples here may not be a good thing.
May 8, 2023
9
-
-

I'm assuming that the category title is intended to be a catch-all for topics that don't naturally fall under the other headings listed under Post processing software and techniques. I wasn't reading it to have anything to do with the degree of processing or obviousness of the processing. I've seen "for play" already posted but I generally never bother with those.
-
Yes, 'general' as in anything else, rather than 'minimal'.
Alan
-

You're asking two very different questions: 1) what "general retouching means to most people, and 2) what people generally prefer.
The meaning of "general retouching" depends on the context. There are tight restrictions on retouching in photojournalism and forensics, for example. I would call that minimal retouching -- setting white point, tweaking exposure, slight sharpening if needed, etc. But there are no such restrictions with photos for personal use like printing and hanging on the family wall, or putting on a printed invitation for a child's birthday party. And still less on a forum like this when someone posts an image and invites everyone to "have a go" -- which frequently happened years ago on the DPReview Retouching forum. Sadly, it evolved into a software forum, with near to no discussion of editing techniques, of the craft of editing.
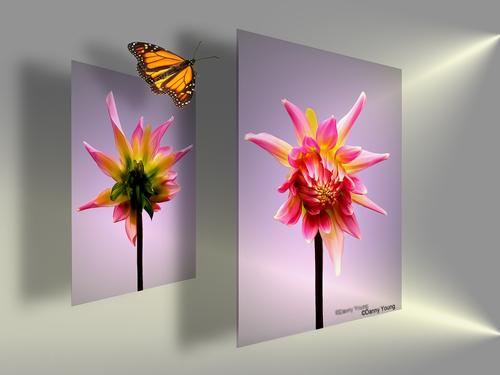
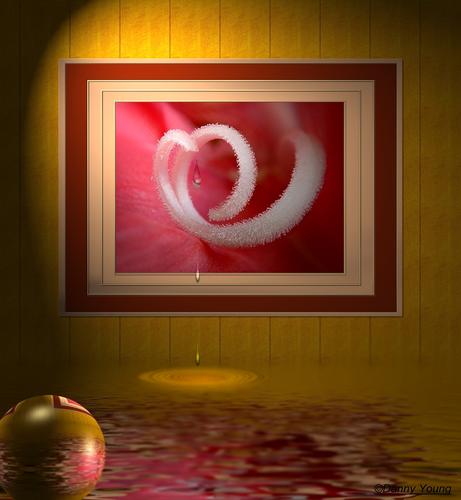
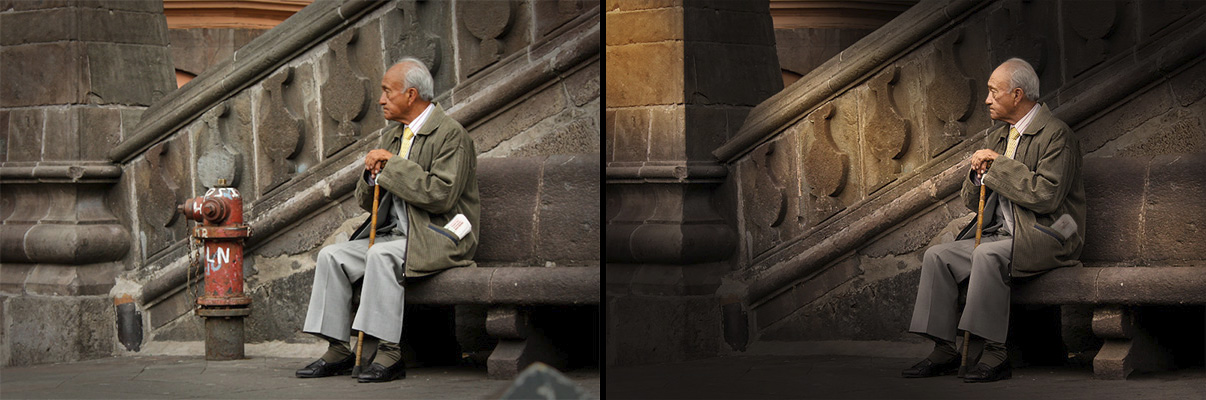
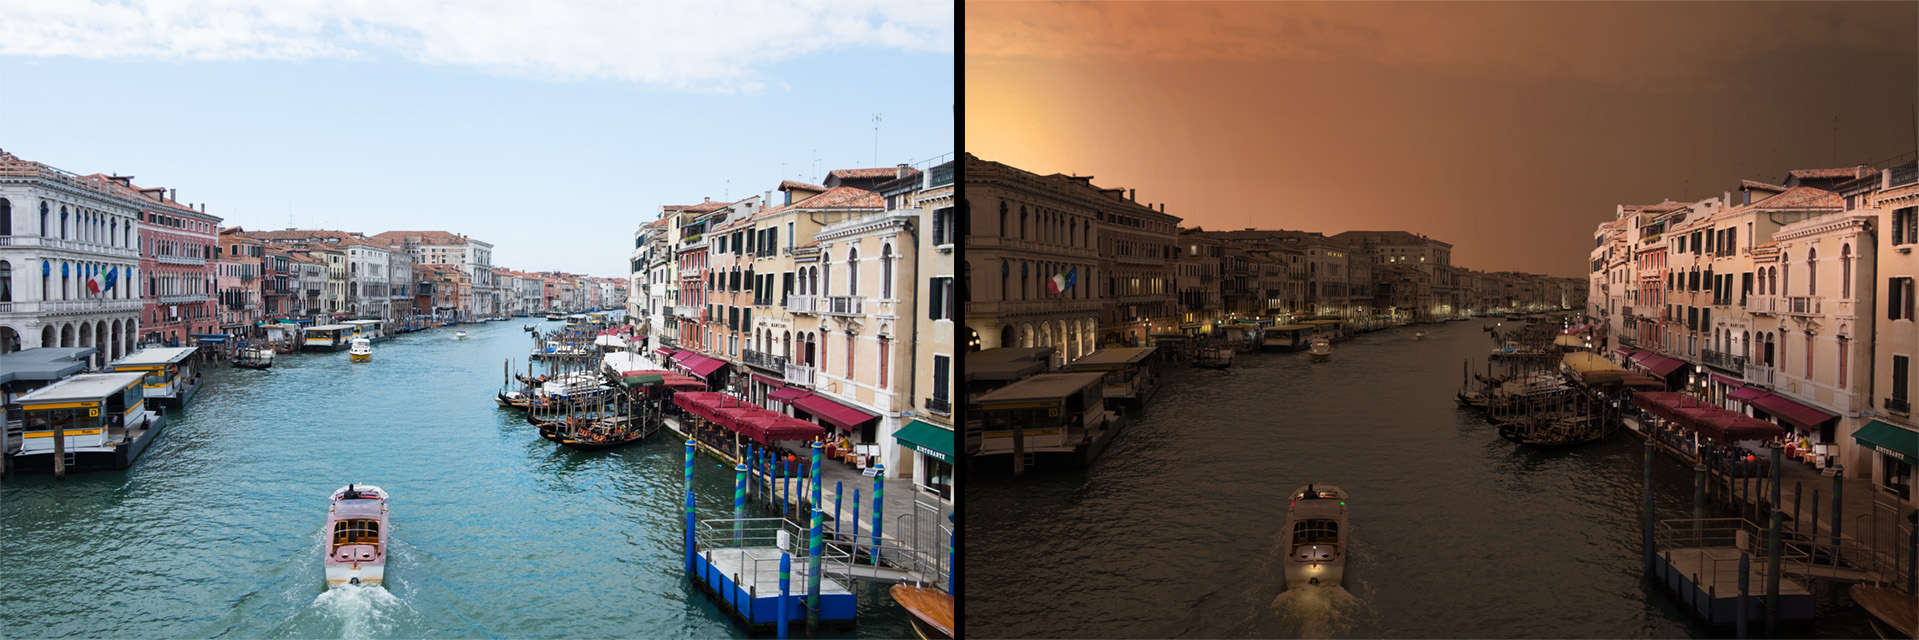
But as to what individuals prefer, anything goes. On the old DPR forum, I often did fairly radical edits to learn new techniques and just have fun. Here are three (out of thousands) I edited according to my own preferences. I learned a lot by doing these and by teaching others the techniques I used -- and learning techniques that they used. To me it's disappointing to see "Retouching" forums in which most of the posts are about software, and so few are about the art and craft of editing an image. /rant

-

I'd be interested in some more detail about how you did these, especially changing the character of the lighting in the first and third ones. Removing the fire hydrant - no problem. For the lighting... is that maybe a color layer, probably with a gradient, and changing the blending mode? (I haven't played with the blending modes enough to remember off the top of my head which would be best for this, but I could get that part by experimenting...)
-
The answer is going to depend on the tool you use for post.
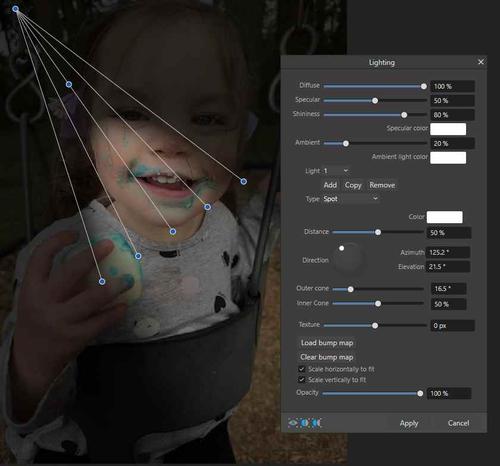
Affinity Photo has a lighting module that allows you to do lighting specific edits.
-
Yes it's always handy depending on how far you want to go and lighting effects can work really well to use for highlighting. I use Ulead photoimpact (latest version is around 12 years old and not that stable on windows 10 or 11) and photoshop for lighting effects quite often. Problem is Corel bought and killed off Ulead photoimpact because it was eating into Corel photopaint. Typical Corel.
So with the lighting effects you can expand the canvas and set the lights from outside the image and then crop in later as well if you want.
The lighting effects in some software can be useful for sure.
Danny.
-
Sorry to be so long replying. I subscribed to the thread but didn't receive notice of new posts.
The easiest way to explain my techniques in these is to give you the PSD file for the third one (Venice canal). I use Photoshop CS6. The heart of the technique is a group two hue/sat adjustment layers: one to adjust brightness, the other to add tint. Then use layer masks to hide or reveal those adjustments where needed. I'd suggest turning off all layers except the base, then work your way up the layer stack, turning them on one at a time to see what I did. Be aware of blend modes.
Here is a link to the PSD file. I downsized it to 1200 px height to reduce file size:
ln5.sync.com/dl/21a6bacd0/e5u3zt8e-v6zi9um3-8qhwdcnd-f25s9za5If you have questions, I'll be glad to answer them.
EDIT: Here is a series of posts I did on another forum as a sort of tutorial for day-to-night conversion. The first post is here:
photography-on-the.net/forum/showthread.php?p=19306911
Page forward for additional posts. -
Thanks for sharing. Unfortunately Gimp can't handle the layer group. I must guess.
BTW. The red and green navigation lights of the boat should not be visible from backside. 😜
Look en.wikipedia.org/wiki/Navigation_light#/media/File:Propmec50.PNG
Edit. Forum software cut the link at :
You have to copy and paste the link in your browser or use this en.wikipedia.org/wiki/Navigation_light#
and then click the first picture bigger. -
Thanks for that! I learned something new. Sorry you can't open the PSD file.